How to create a Python virtual environment for Jupyter
Learn how to create a Python virtual environment for your Jupyter notebook using venv and virtualenv to help avoid package clashes that mess up your system.

When you use pip to install Python packages from The Python Package Index (PyPi) they get stored in your site-packages directory and are used across your system whenever you run a Python application. As the packages you install are made by different developers at different times, they often use or require different versions of packages, so updating one may break another.
On an Ubuntu data science workstation, you can take a look at the packages installed (and view their source code to see how they work) by going to /usr/local/lib/python3.8/site-packages (where python3.8 matches the major Python version you’re using, as shown by the command python --version).
To avoid running into a situation where you break your global Python installation, it’s a good idea to create a “virtual environment” in which to run each Python project you work upon. A virtual environment gives you a self-contained site-packages directory for a given version of Python - effectively giving you a blank canvas into which you can safely install, test and develop packages on a clean Python install without the risk of breaking anything.
If you’re building one system which requires the use of a specific older version of a given package, you can give it its own virtual environment and run your others in virtual environments using the latest release of the package. It’s a really useful technique and can save you time in the long run.
Creating a virtual environment
In Python 3.3 and later, virtual environments can be made using venv. This package is now part of Python’s standard library, so there’s usually no need to install it. Though that’s not the case with Debian/Ubuntu, for some reason. Here, you will need to run sudo apt-get install python3-venv to get up and running.
Once venv is installed, simply open your terminal cd to the desired location on your machine, run venv and tell it the name of the directory into which to create the virtual environment.
python3 -m venv myvenv
Python will create a self-contained virtual environment in the directory specified and will create the directory for you if it doesn’t already exist. If you cd into the myvenv directory you just created, you’ll find that it now contains a number of directories: bin, include, lib, lib64, pyvenv.cfg and share. The bin directory contains the code to run the venv and install packages, while lib/python3.8 contains your self-contained site-packages directory.
Activating the virtual environment
To start using the virtual environment, you just need to type source myvenv/bin/activate into your terminal. After you’ve issued this command, you’ll notice that your command prompt is prefixed with the name of the venv i.e. (myvenv) matt@SonOfAnton:/development/Python/ which lets you know that you’re currently running commands in the safety of the virtual environment and not on your main system.
Running a Jupyter notebook
To run a Jupyter notebook in this self-contained environment, just type jupyter notebook in your terminal and Jupyter should fire up in your browser. As this is a totally blank canvas, any packages you regularly use - like Pandas and Numpy - won’t be installed and you’ll need to install them again in the venv.
To install these you can type pip3 install pandas and pip3 install numpy and let Python do its stuff. The packages will then be added to the site-packages directory in your virtual environment and your main system packages will be left untouched.

Deactivating the virtual environment
To deactivate your venv when you have finished working, you can type deactivate into the terminal. (If you’re currently running Jupyter you’ll first need to shut it down by typing CTRL + C and then typing y.
Using virtual environments in PyCharm CE
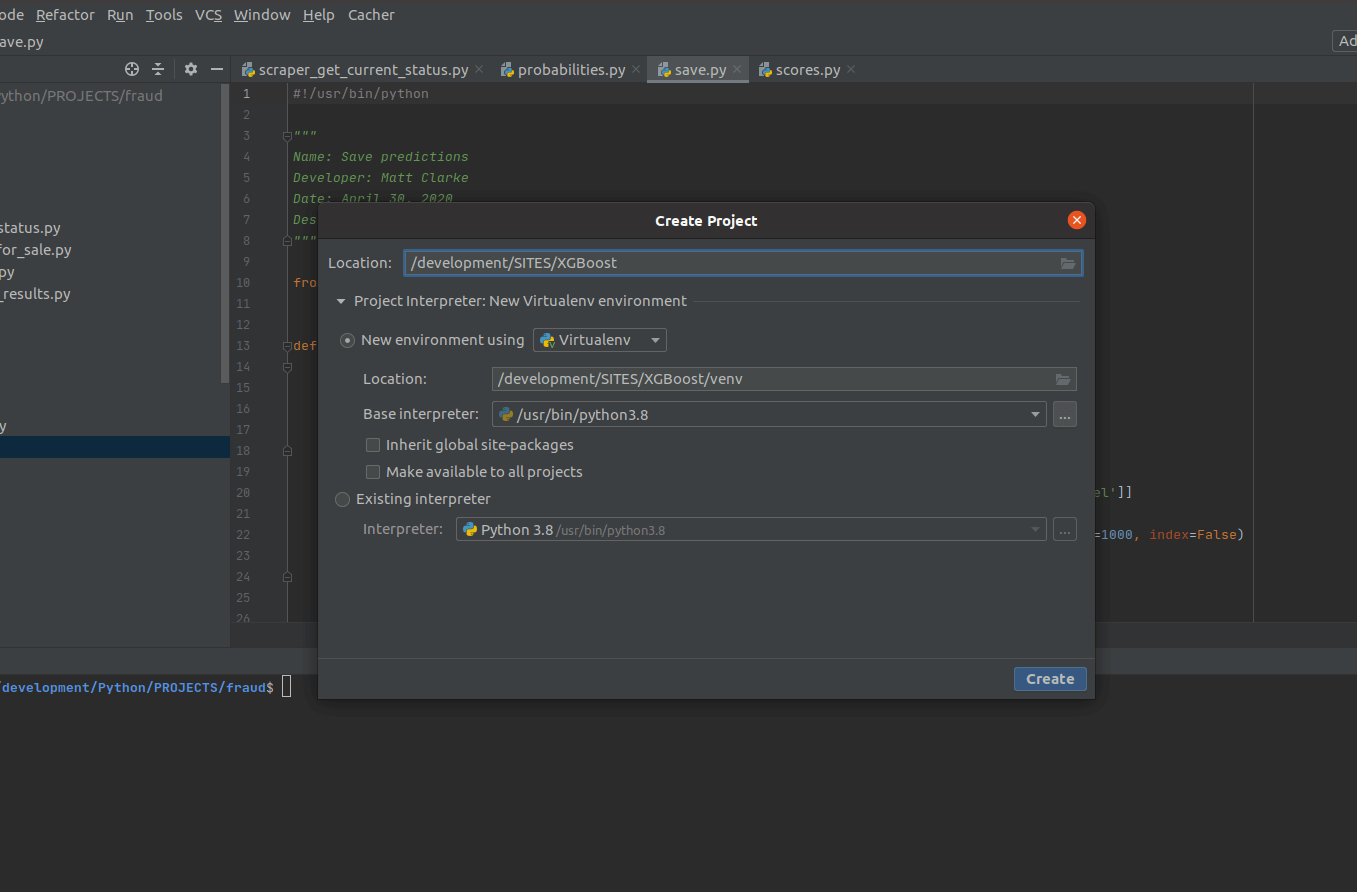
If you also use a proper IDE for developing your Python code, you’ll be pleased to know you can do exactly the same thing there. I use PyCharm Community Edition for most of my development (with Jupyter just used for prototyping and EDA) and when creating a new project it offers you the option to set the project interpreter to use a virtual environment using a specific version of Python. It’s a handy way of keeping your projects clean and makes deployment much easier, as you can easily see which packages and versions are required.

Matt Clarke, Monday, March 01, 2021


