How to annotate training data for NLP models using Doccano
Doccano is a text annotation platform for NLP that makes it much quicker and easier to label and tag named entities in your text. Here's how to use it.
Whether you’re performing product attribute extraction, named entity recognition, product matching, product categorisation, review sentiment analysis, or you are sorting and prioritising customer support tickets, NLP models can be extremely powerful. Many models provide good results out-of-the-box, but it’s highly likely that at some point you’ll need to train a custom model to maximise its performance.
Since NLP is a supervised learning technique, to train a custom model you will require a good volume of carefully labelled text data that you can use to teach the model whether the sentiment is positive or negative, or where the brand names, or product attributes start and finish within a piece of text.
As you might imagine, annotating or labeling text can take a very long time. It is also really, really dull and can be very fiddly if tackled manually.
Using Doccano for text annotation…
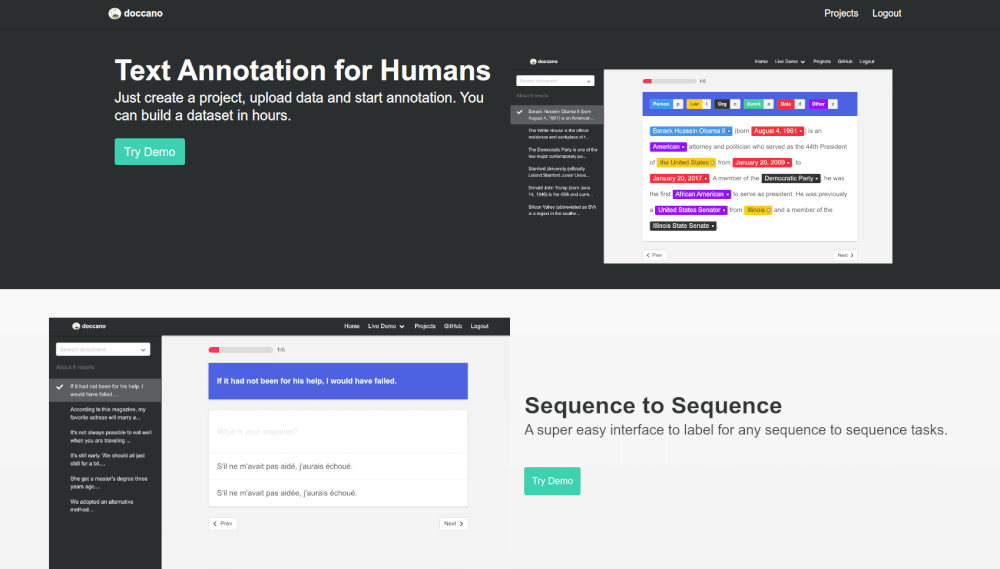
Doccano is an open source application designed to make the text annotation or text labeling process much quicker and easier for data scientists. It allows you to load up a dataset and then categorise or label it using a user-friendly web interface, and then output the results in a format that can be used in a range of NLP modeling platforms, such as Spacy.
Doccano can be used for a range of text annotation, text classification and labeling tasks for Natural Language Processing projects. These include sequence labeling for Named Entity Recognition (NER), part-of-speech (POS) tagging, and semantic role labeling; Sequence to Sequence tasks, such as string translation; Document Classification, for things like sentiment analysis, and even speech to text audio classification.
It’s also designed for use by multiple users, so staff can collaborate on text annotation projects and share the pain of text labeling with you. Here’s how you can install it and get up and running to create an NLP dataset based on some ecommerce product data.
Understanding NLP training data
Training data for NLP projects is usually provided in CSV or JSON format. CSV is used on text classification tasks, like positive or negative, sarcasm or not sarcasm, while JSON is used for annotating text.
For text annotation the JSON data comprises an object include the ID, the string of text itself, and the labels found and their start and end positions. Clearly, it would take ages to try and do this by hand.
{
  "id": 3863,
  "text": "amd ryzen 7 eight core 1700x 3.80ghz socket am4 processor retail",
  "meta": {},
  "annotation_approver": null,
  "labels": [
    [
      0,
      3,
      "brand"
    ],
    [
      29,
      33,
      "speed"
    ],
    [
      4,
      11,
      "range"
    ],
    [
      23,
      28,
      "model"
    ],
    [
      12,
      22,
      "cores"
    ],
    [
      37,
      47,
      "socket"
    ],
    [
      58,
      64,
      "packaging"
    ]
  ]
}
Install Doccano via Docker
Doccano is a web-based application, like a Jupyter notebook, and runs on a server on your local machine. It’s easy to install using Docker. First, go open a terminal and enter docker pull doccano/doccano to pull the latest version of Doccano from Docker Hub to your local machine.
docker pull doccano/doccano
Next, use docker container create to name your Doccano container (I’ve called mine docker_doccano) and then pass in the credentials you want to use to access the application and the port numbers you want to use to access it.
docker container create --name docker_doccano \
-e "ADMIN_USERNAME=admin" \
-e "ADMIN_EMAIL=admin@example.com" \
-e "ADMIN_PASSWORD=password" \
-p 8000:8000 doccano/doccano
Once that’s done, you can then enter docker start docker_doccano and go to http://0.0.0.0:8000/ to access the Doccano web interface. To get a feel of what you can do in Doccano, there’s a built-in demo at http://0.0.0.0:8000/demo/named-entity-recognition/ you can try that covers sentiment analysis, named entity recognition (NER), and translation.
docker start docker_doccano
Create a new Doccano project
Login to your local version of Doccano and create a new project. You can create projects for document classification, sequence labeling, sequence-to-sequence (or Seq2Seq) models, and speech to text.

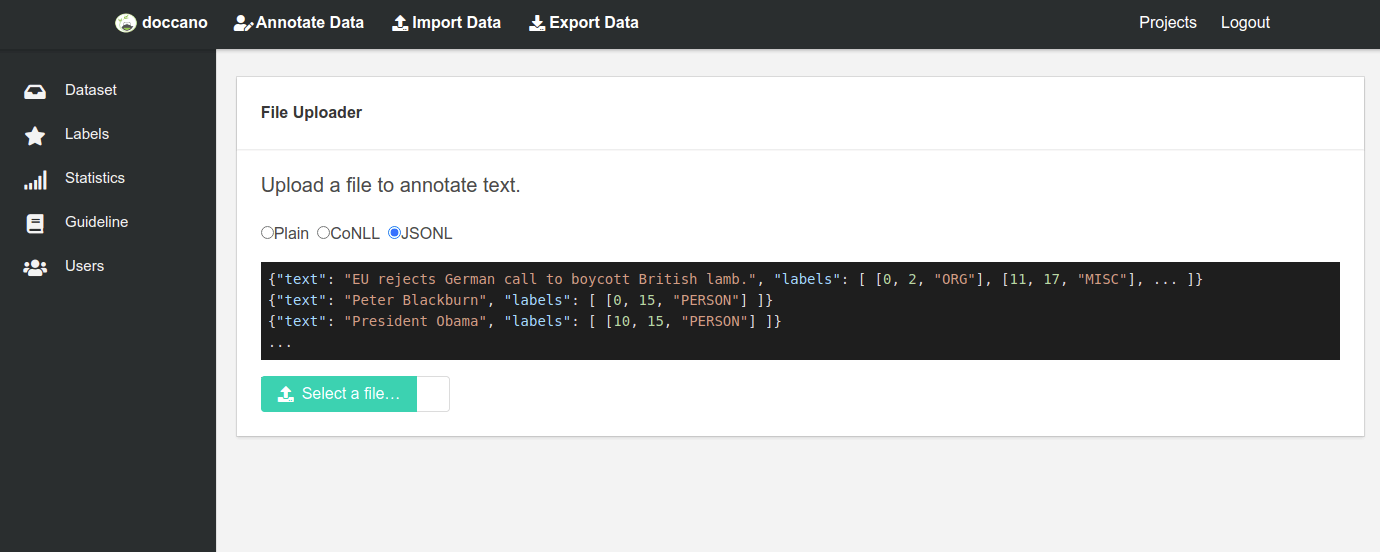
Import training data
Doccano supports various import formats for data. I imported a single column of a CSV file containing some product names for my attribute extraction project. Doccano supports plain text, CoNLL, and JSONL upload formats.
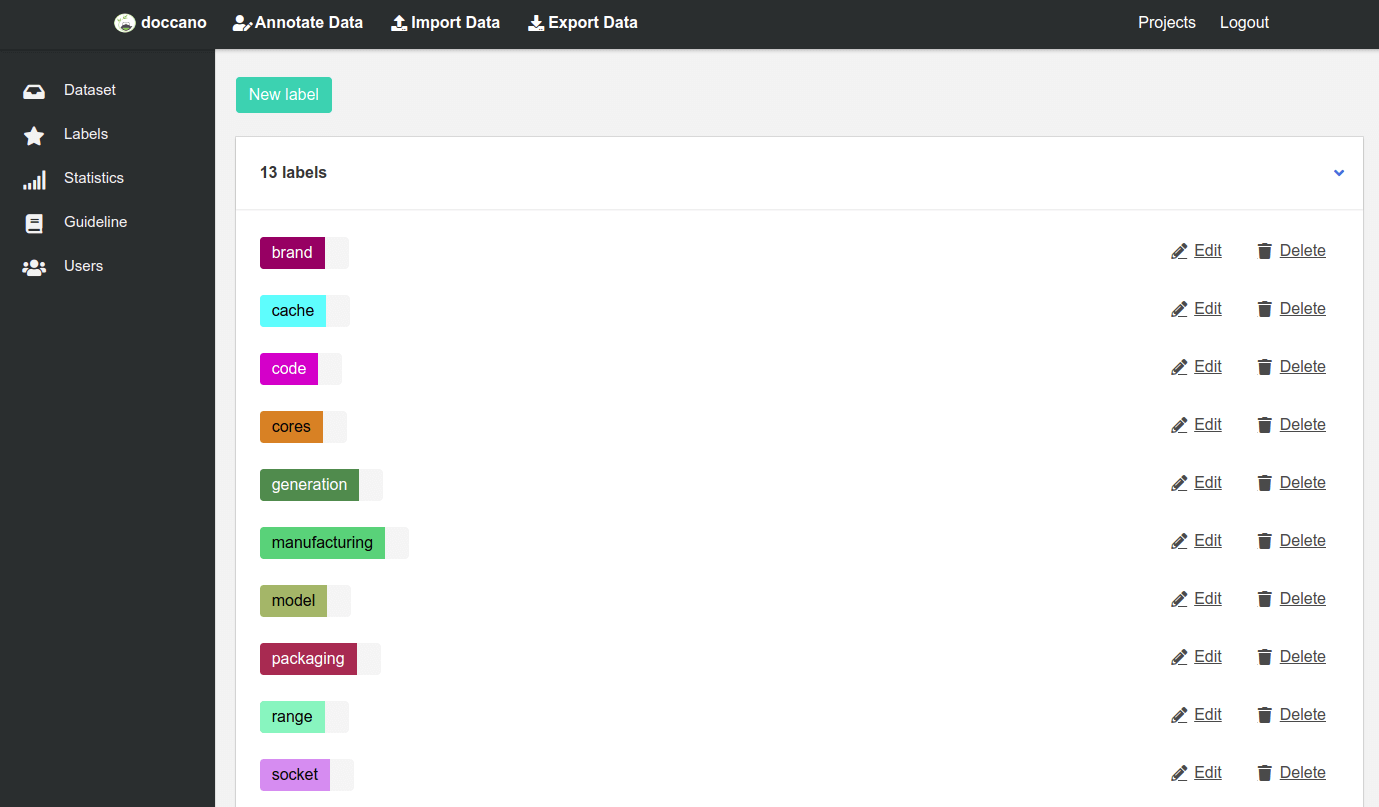
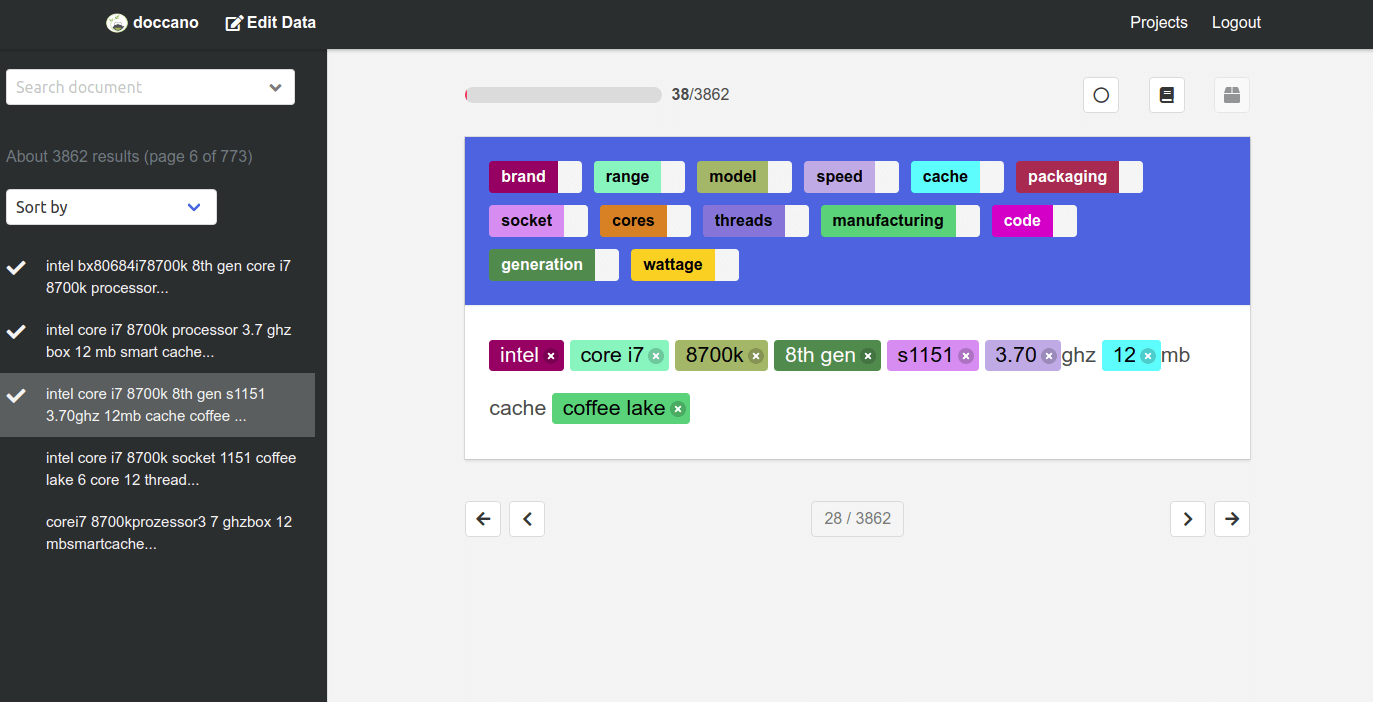
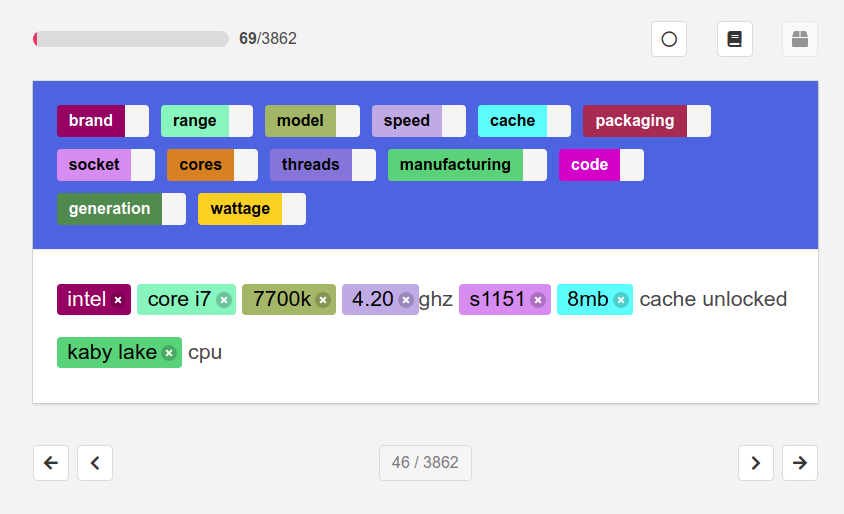
Create labels
Once the data have been loaded into your project you need to create some labels. You can assign keyboard shortcuts to these to speed the process up. This is important, because the text annotation process is time consuming and expensive.
Set guidelines
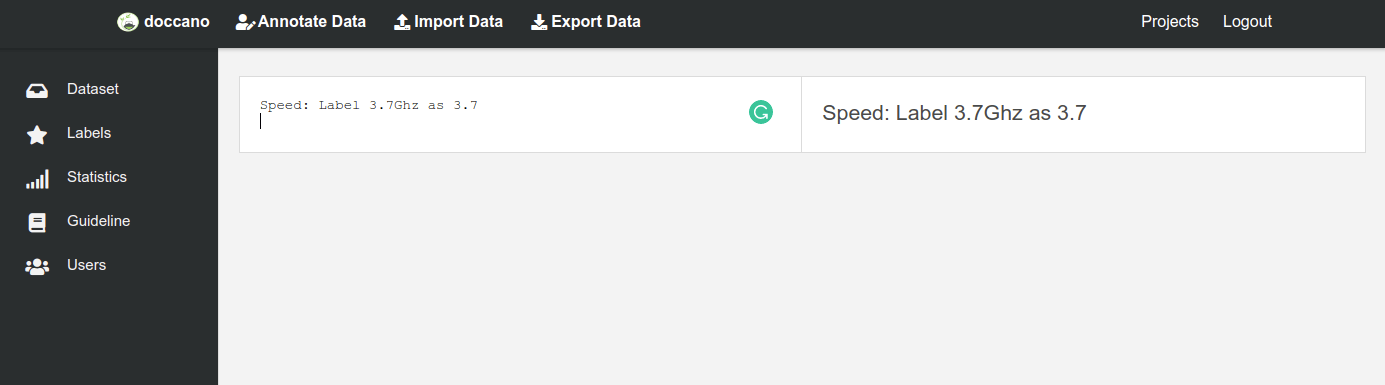
To help annotators achieve better consistency when they are labeling text, it’s helpful to add guidelines on how text should be annotated. If a product name contains “3.7GHz” should the annotator include the whole string with the “GHz” or just the “3.7” figure?
Annotate your data
Next you need to get your annotators to sign up at http://0.0.0.0:8000/signup/ and then assign them to your project and let them to annotate each piece of text using your guidelines and labels. Before releasing the tasks, I would recommend you do a batch yourself to check you’ve got the right labels and shortcuts set up.
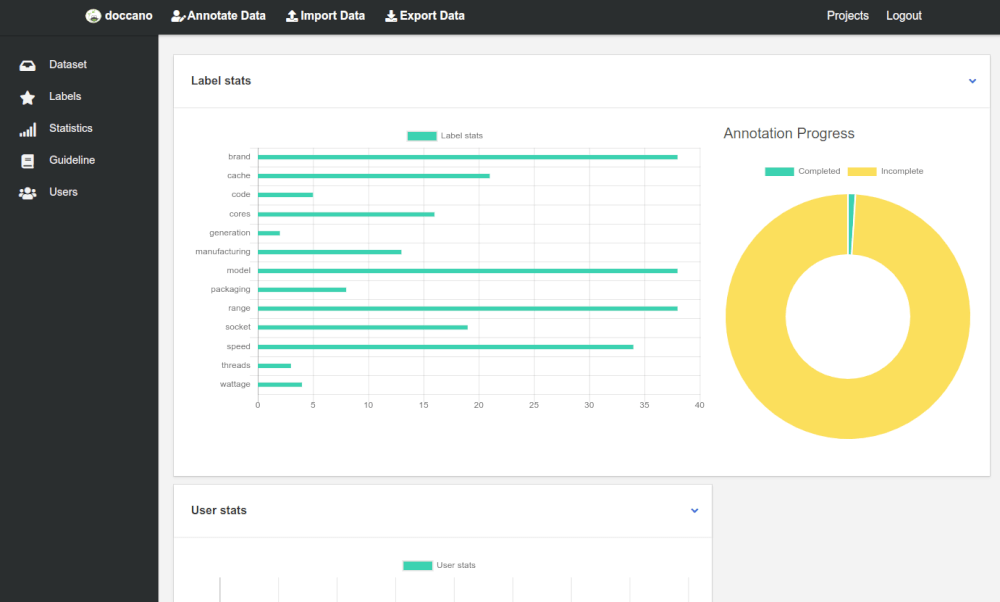
Examine statistics
To check on progress and monitor how many texts humans have annotated, there are a couple of charts and tables. The pie chart shows how much of the text has been annotated so far.
Active Learning
Active learning or auto labeling utilises machine learning to examine the labels human annotators are assigning to elements within the text and then automatically adds labels when it recognises matches. Human annotators then get a head start and fewer items to annotate or correct. This is massively useful, when you appreciate how laborious text annotation is.
Export your data
Finally, when all of your text has been labeled and approved, by the text annotation team, you can export your data and use it in your model. You can export data in either JSONL or JSONL with text labels. JSONL with text labels is the standard format, but you can also export the project JSON.
JSONL with text labels
{
  "id": 3863,
  "text": "amd ryzen 7 eight core 1700x 3.80ghz socket am4 processor retail",
  "meta": {},
  "annotation_approver": null,
  "labels": [
    [
      0,
      3,
      "brand"
    ],
    [
      29,
      33,
      "speed"
    ],
    [
      4,
      11,
      "range"
    ],
    [
      23,
      28,
      "model"
    ],
    [
      12,
      22,
      "cores"
    ],
    [
      37,
      47,
      "socket"
    ],
    [
      58,
      64,
      "packaging"
    ]
  ]
}
JSONL
{
  "id": 3863,
  "text": "amd ryzen 7 eight core 1700x 3.80ghz socket am4 processor retail",
  "annotations": [
    {
      "label": 4,
      "start_offset": 0,
      "end_offset": 3,
      "user": 1,
      "created_at": "2020-10-21T09:25:44.501540Z",
      "updated_at": "2020-10-21T09:25:44.501558Z"
    },
    {
      "label": 7,
      "start_offset": 29,
      "end_offset": 33,
      "user": 1,
      "created_at": "2020-10-21T09:25:57.100876Z",
      "updated_at": "2020-10-21T09:25:57.100893Z"
    },
    {
      "label": 5,
      "start_offset": 4,
      "end_offset": 11,
      "user": 1,
      "created_at": "2020-10-21T09:26:04.990127Z",
      "updated_at": "2020-10-21T09:26:04.990145Z"
    },
    {
      "label": 6,
      "start_offset": 23,
      "end_offset": 28,
      "user": 1,
      "created_at": "2020-10-21T09:26:07.532911Z",
      "updated_at": "2020-10-21T09:26:07.532929Z"
    },
    {
      "label": 11,
      "start_offset": 12,
      "end_offset": 22,
      "user": 1,
      "created_at": "2020-10-21T09:26:49.069356Z",
      "updated_at": "2020-10-21T09:26:49.069373Z"
    },
    {
      "label": 10,
      "start_offset": 37,
      "end_offset": 47,
      "user": 1,
      "created_at": "2020-10-21T09:26:54.605349Z",
      "updated_at": "2020-10-21T09:26:54.605366Z"
    },
    {
      "label": 9,
      "start_offset": 58,
      "end_offset": 64,
      "user": 1,
      "created_at": "2020-10-21T09:26:58.029150Z",
      "updated_at": "2020-10-21T09:26:58.029167Z"
    }
  ],
  "meta": {},
  "annotation_approver": null
}
While Doccano makes the text annotation much quicker and easier than doing things by hand, I’ve still found it useful to perform automated text annotation in Python prior to finishing things manually in Doccano. This massively speeds up the process and can save days of labour on larger datasets.
Matt Clarke, Thursday, March 04, 2021


Other posts you might like

How to tune a LightGBMClassifier model with Optuna
The LightGBM model is a gradient boosting framework that uses tree-based learning algorithms, much like the popular XGBoost model. LightGBM supports both classification and regression tasks, and is known for...

How to create a customer retention model with XGBoost
Although all business know the importance of retaining customers, few companies are actually able to measure customer retention accurately, and fewer still can predict which ones will churn or be...
